Product Release Version: v25.0.0
August 2024 Product Release
© 2024 Practice Management System
Disclaimer: All rights are reserved. No part of this work may be reproduced in any form or by any means graphic, electronic, or mechanical, including photocopy, recording, or information storage and retrieval systems – without written permission of the publisher.
The products that are referred to in this document may be either trademarks and/or registered trademarks of the respective owners. The publisher and the author do not claim these trademarks.
While every precaution has been taken in the preparation of this document, the publisher and the author assume no responsibility for errors or omissions or for damages resulting from the use of the information contained in this document or from the use of programs and source code that may accompany it. In no event shall the publisher and the author be liable for any loss of profit or any other commercial damage caused or alleged to have been caused directly or indirectly by this document.
Printed August 2024 at PracticeSuite, Inc.
Part 1- Product Enhancements
1.1 ERA Automation
Practice Management System has launched an advanced AI-driven solution for automating ERA posting and operating on pre-set user-defined rules. The automation settings can be found in the Advanced Setup under the Billing Options screen, where users can add new auto-posting rules or modify existing ones. Please see Image 1.1a.
Rules for auto-posting are created through the Billing Options page.
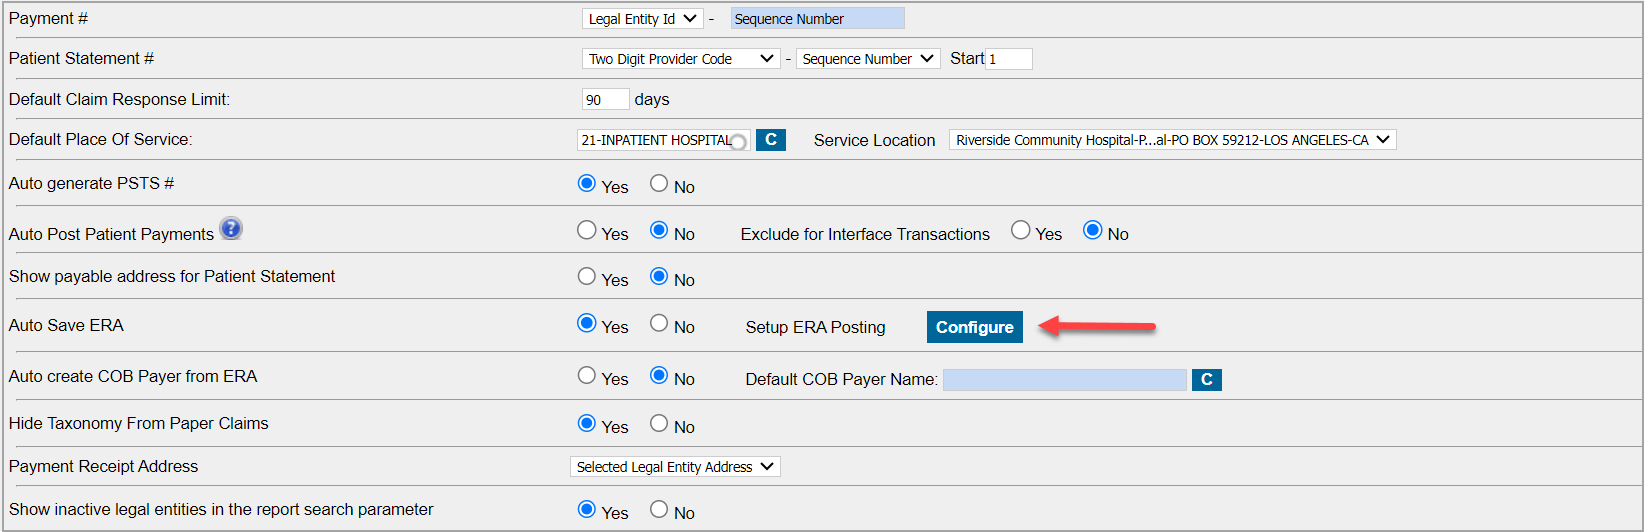
On clicking “Configure”, it opens the auto-posting setup screen and displays the list of rules that have been configured. Users should see a list of predefined rules based on existing payer requirements, and these are currently used by the system to process the ERAs. Users can either deactivate or modify them as needed.
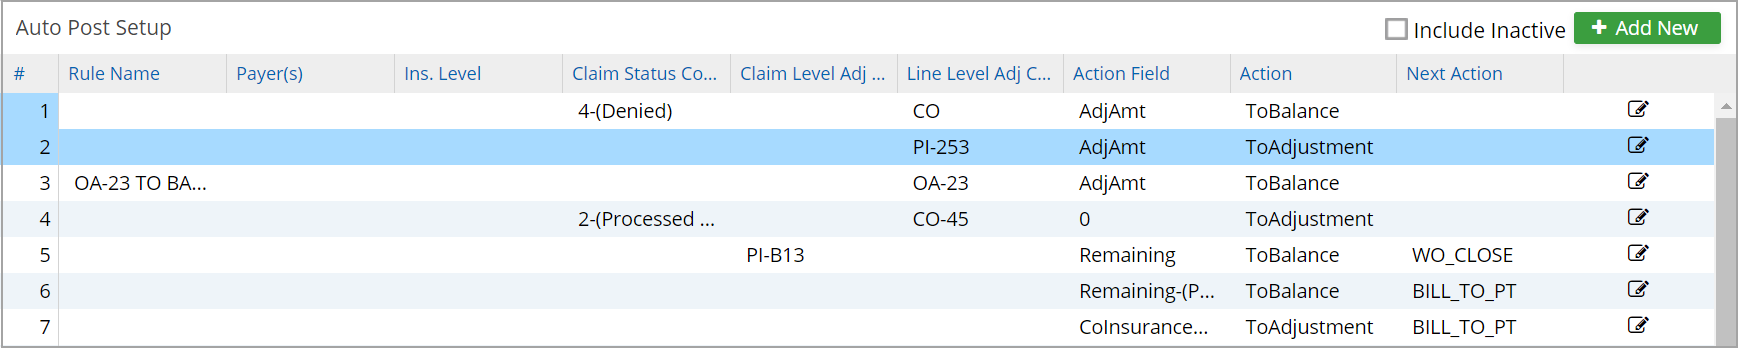
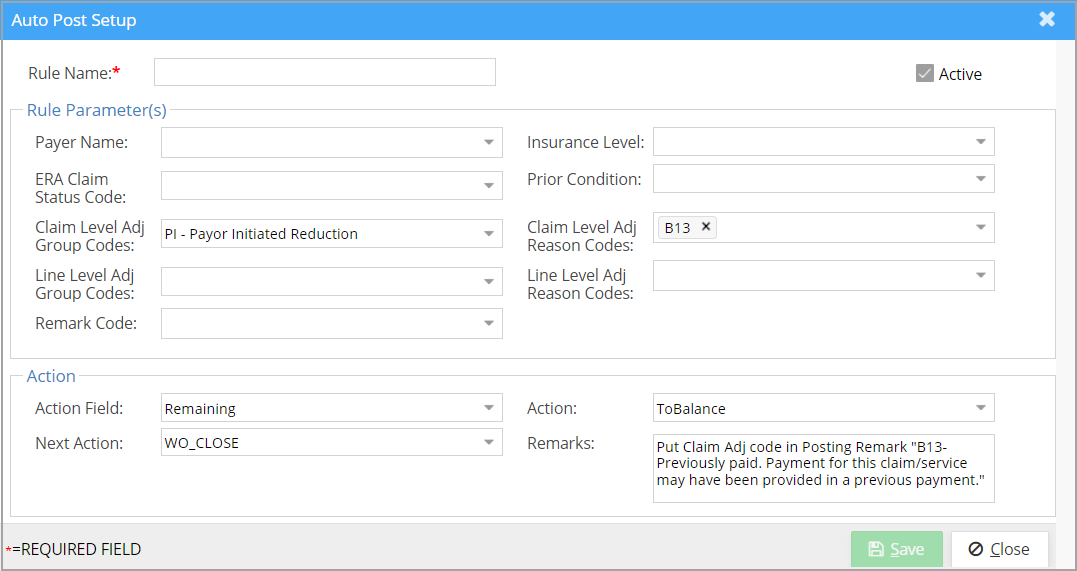
To add a new rule, click on the “Add New” button at the top right-hand corner of the screen. On the setup screen, the users can input the required parameters and click “Save”.
Once the rules have been configured, click on the “Auto Post” option on the ERA listing screen to have the ERA automatically processed and posted. During the beta phase, users must select the auto-post option to process the ERAs; however, in the subsequent product release, full automation will be implemented, making this step unnecessary for processing the ERAs.

ERA auto-post will automate the payment creation and the posting of each line in the ERA. The following actions are automated in the process:
1. The reversals (takebacks) are first processed.
2. Next, the system populates the line status (Next Action) based on the configured auto posting rule(s). If no rules are added for the workflow, the regular system workflow will apply.
3. Once an ERA is posted, a toast notification stating “ERA Auto Posting Successfully Completed” will appear. The line activity within the Charge Master will display “ERA Auto Posted (AI).”
Kindly be aware that this is a beta version. Further refinements and improvements to the feature are anticipated in the upcoming releases. We are also seeking feedback on our new feature and invite customers to reach out to our support team to share their thoughts.
1.2 X-Superbill Automation
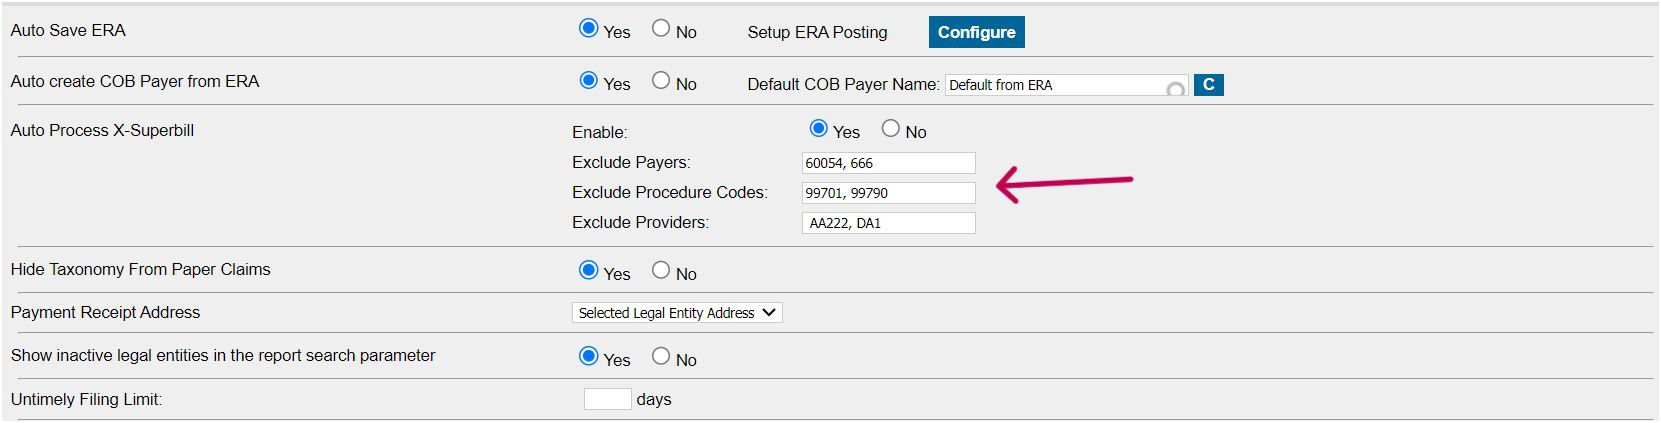
Practice Management System continues to advance its automation capabilities by also introducing the bulk charge processing feature for the XSuperbill screen. X-Superbill automation can be enabled from the Billing Options screen. Pre-existing claim validation rules will apply automatically to check for warnings or errors when processing the charges.
Users have the option to specify payers, providers, procedure codes, and modifiers that should be excluded from automatic processing. For the exclusion filters, payers are to be specified using payer ids and providers by their codes from the Provider Master. Separate using commas (“,”) for multiple entries in a field.
Once the setup on the Billing Options page is complete, go to X-Superbill screen and click on ‘Auto Process’ button under ‘More Filters’.
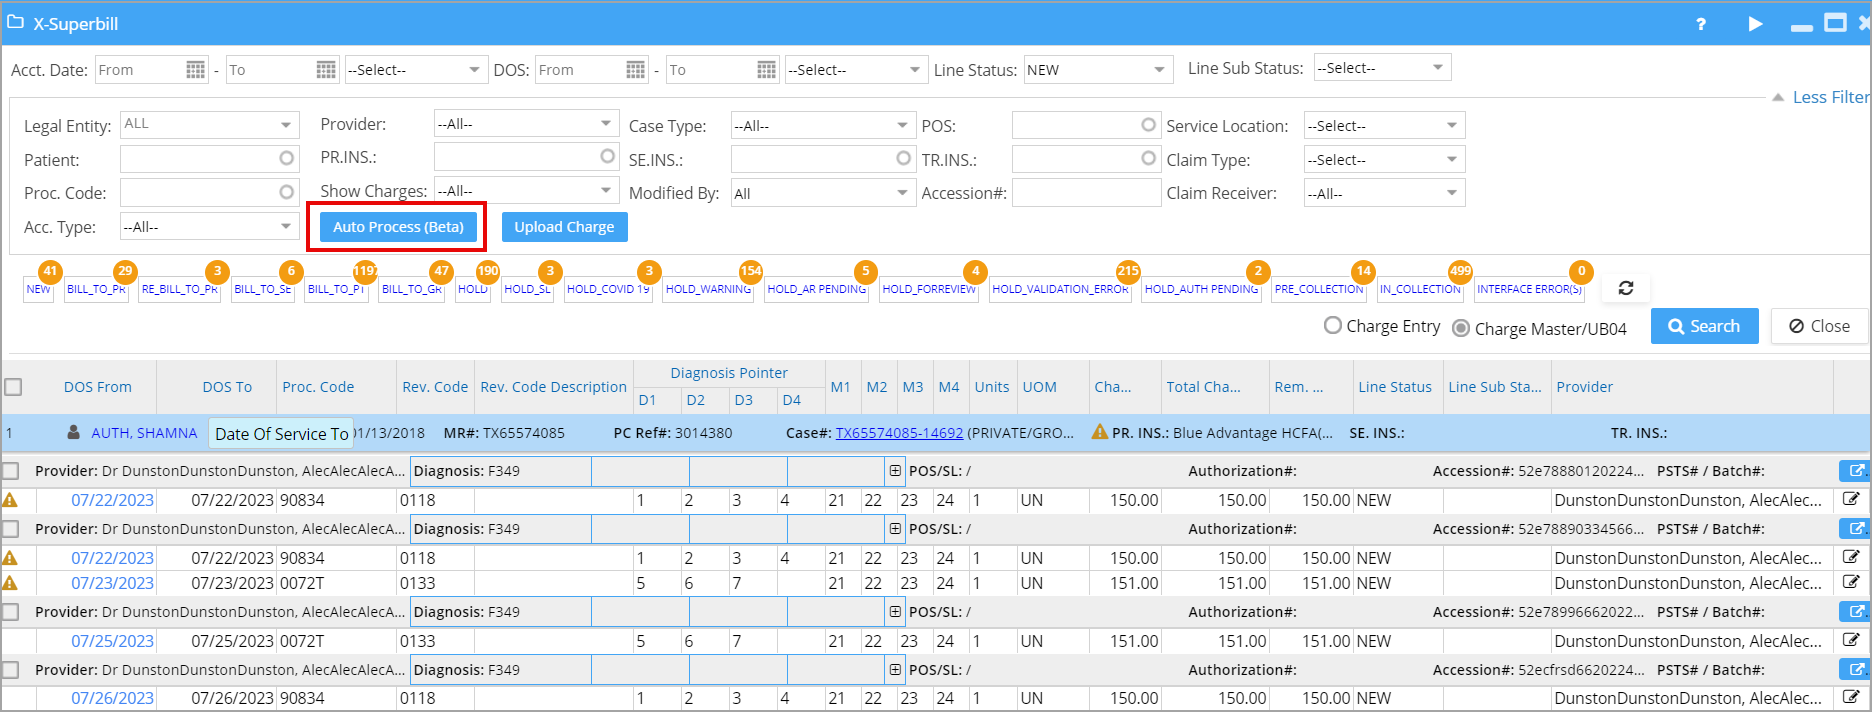
Note: The automation process will consider only those charges in the NEW status and insurance case. It will exclude charges in all other line statuses and cash cases.
X-Superbill automation will work as follows:
1. If there are no errors or warnings in claim validation or system validation at the patient or charge level, the charge will be processed and the appropriate Next Action will be set.
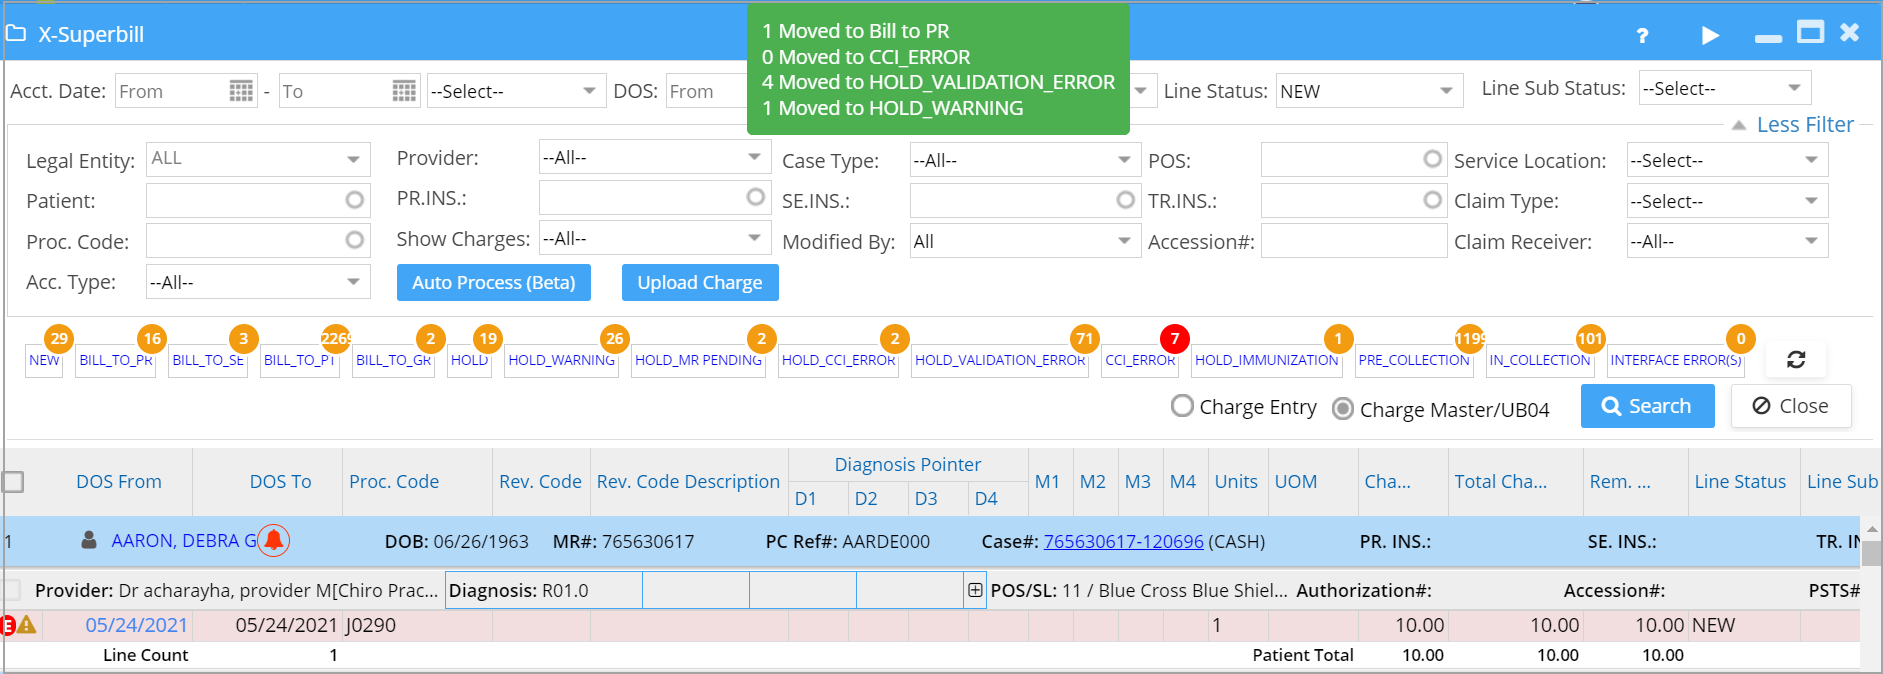
2. If an encounter has any of its lines having CCI errors, then the entire encounter will be pushed to CCI_ERROR bucket, irrespective of whether other lines have errors or not. Line status will be set to HOLD and sub status to CCI_ERROR.
3. If an encounter has no CCI errors but has any one line having a validation error, then the entire encounter will be moved to the HOLD_VALIDATION_ERROR bucket. The line status, in this case, will be set to HOLD, and the substatus will be HOLD_VALIDATION_ERROR.
4. In the absence of CCI errors and validation errors in the lines of an encounter, if any of the lines have a warning, the encounter will be pushed to the HOLD_WARNING bucket. The line status will be set to HOLD, and the sub status will be HOLD_WARNING.
When the X-Superbill automation completes successfully, the system will display a message indicating the number of charges processed and moved to their respective buckets.
Upload Charge
This option is to read charges from a CSV file coming over the interface in the format prescribed.
1.3 eFax- Delete Option in Inbox
Users now have the option to delete efax messages. The deleted items will be moved to the newly created folder ‘Trash’ appearing just beneath the ‘Archives’ folder. The details of the deletion (user, date of deletion, etc.) will be logged in the eFax audit log.

1.4 To-Do Screen
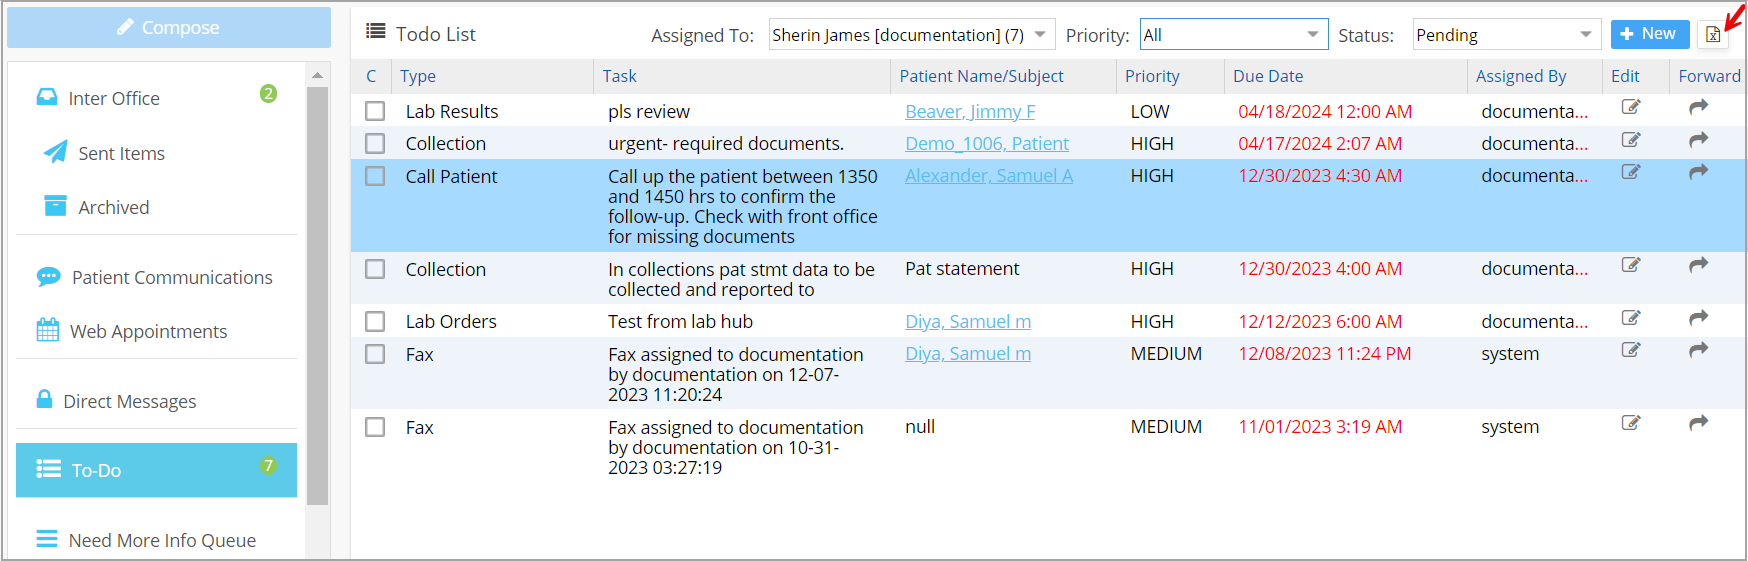
1.4.1 Export Option for Tasks
The To-Do screen will have an Excel output option so that the assigned tasks for the user can be exported and printed, if necessary. If the user provides certain search criteria, the Excel output will also show the results filtered. To view all tasks in the system related to a single patient, users can access the To-Do screen via the patient’s demographics module and generate Excel. Tasks without a specified due date will be listed at the bottom of the Excel file.
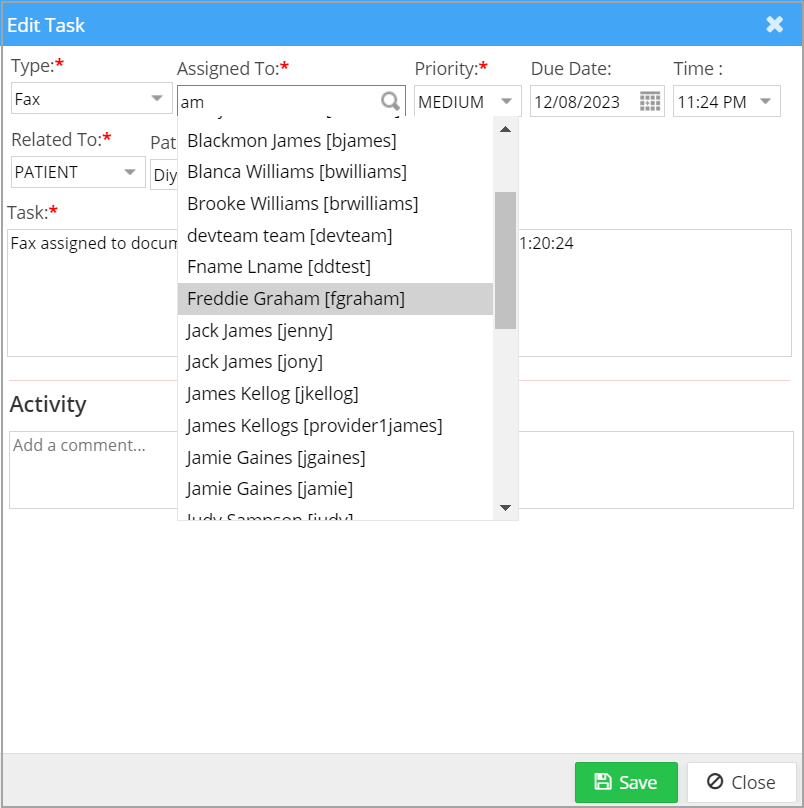
1.4.2 Full User Name Display
In the task assignment Add and Edit screens, the user search field will show the user’s full name along with the user ID.
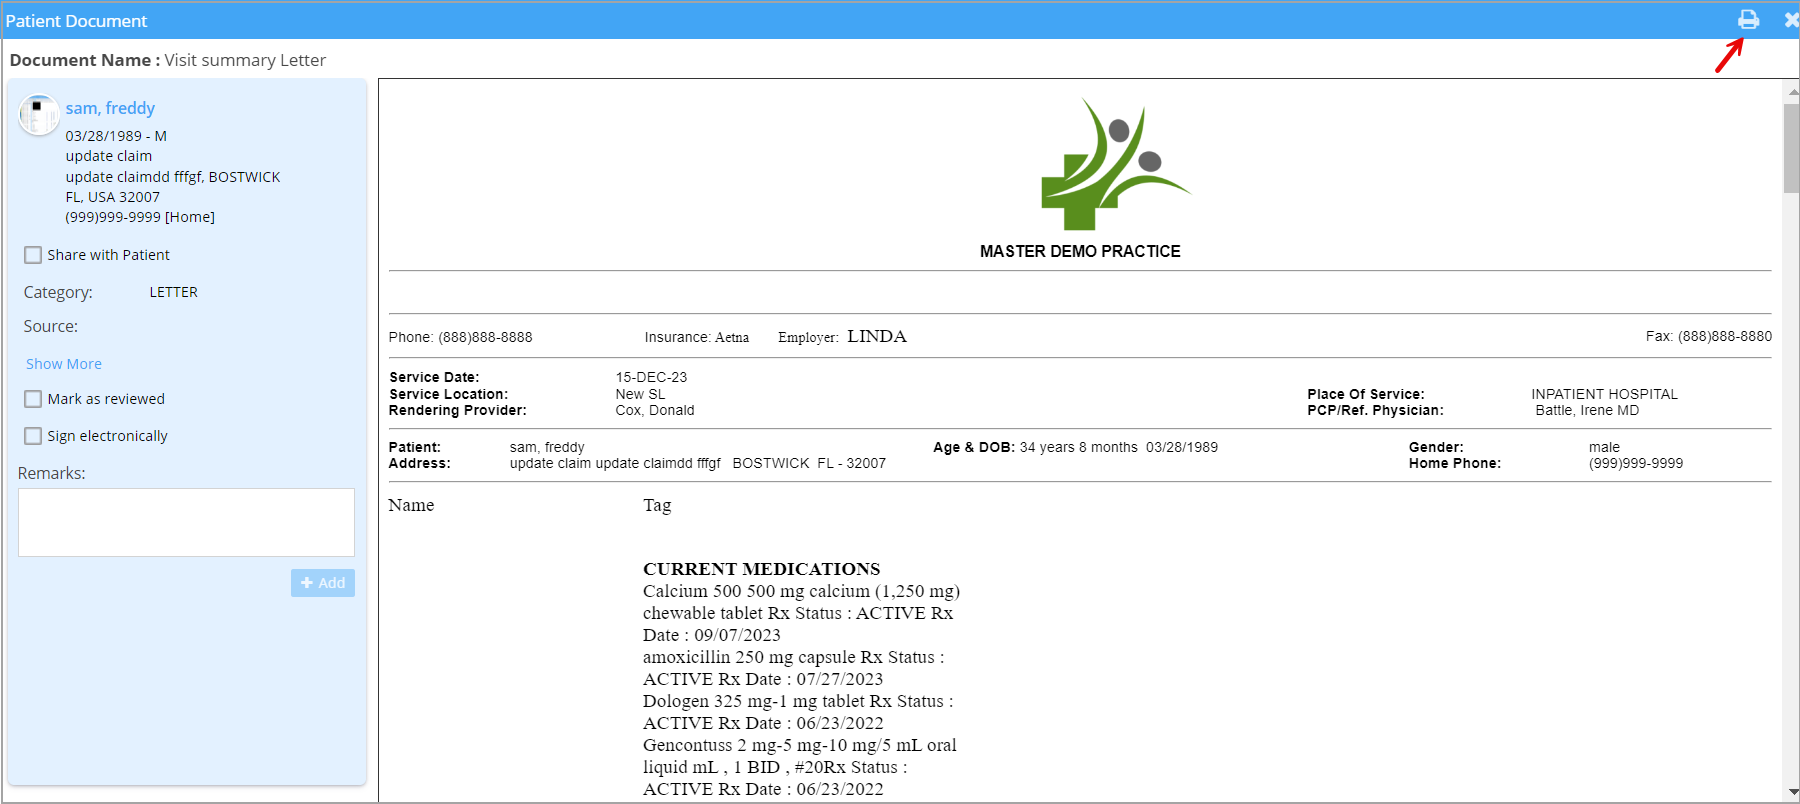
1.5 Document Manager- Image Print Option
The Document Manager will provide a print option for uploaded documents.
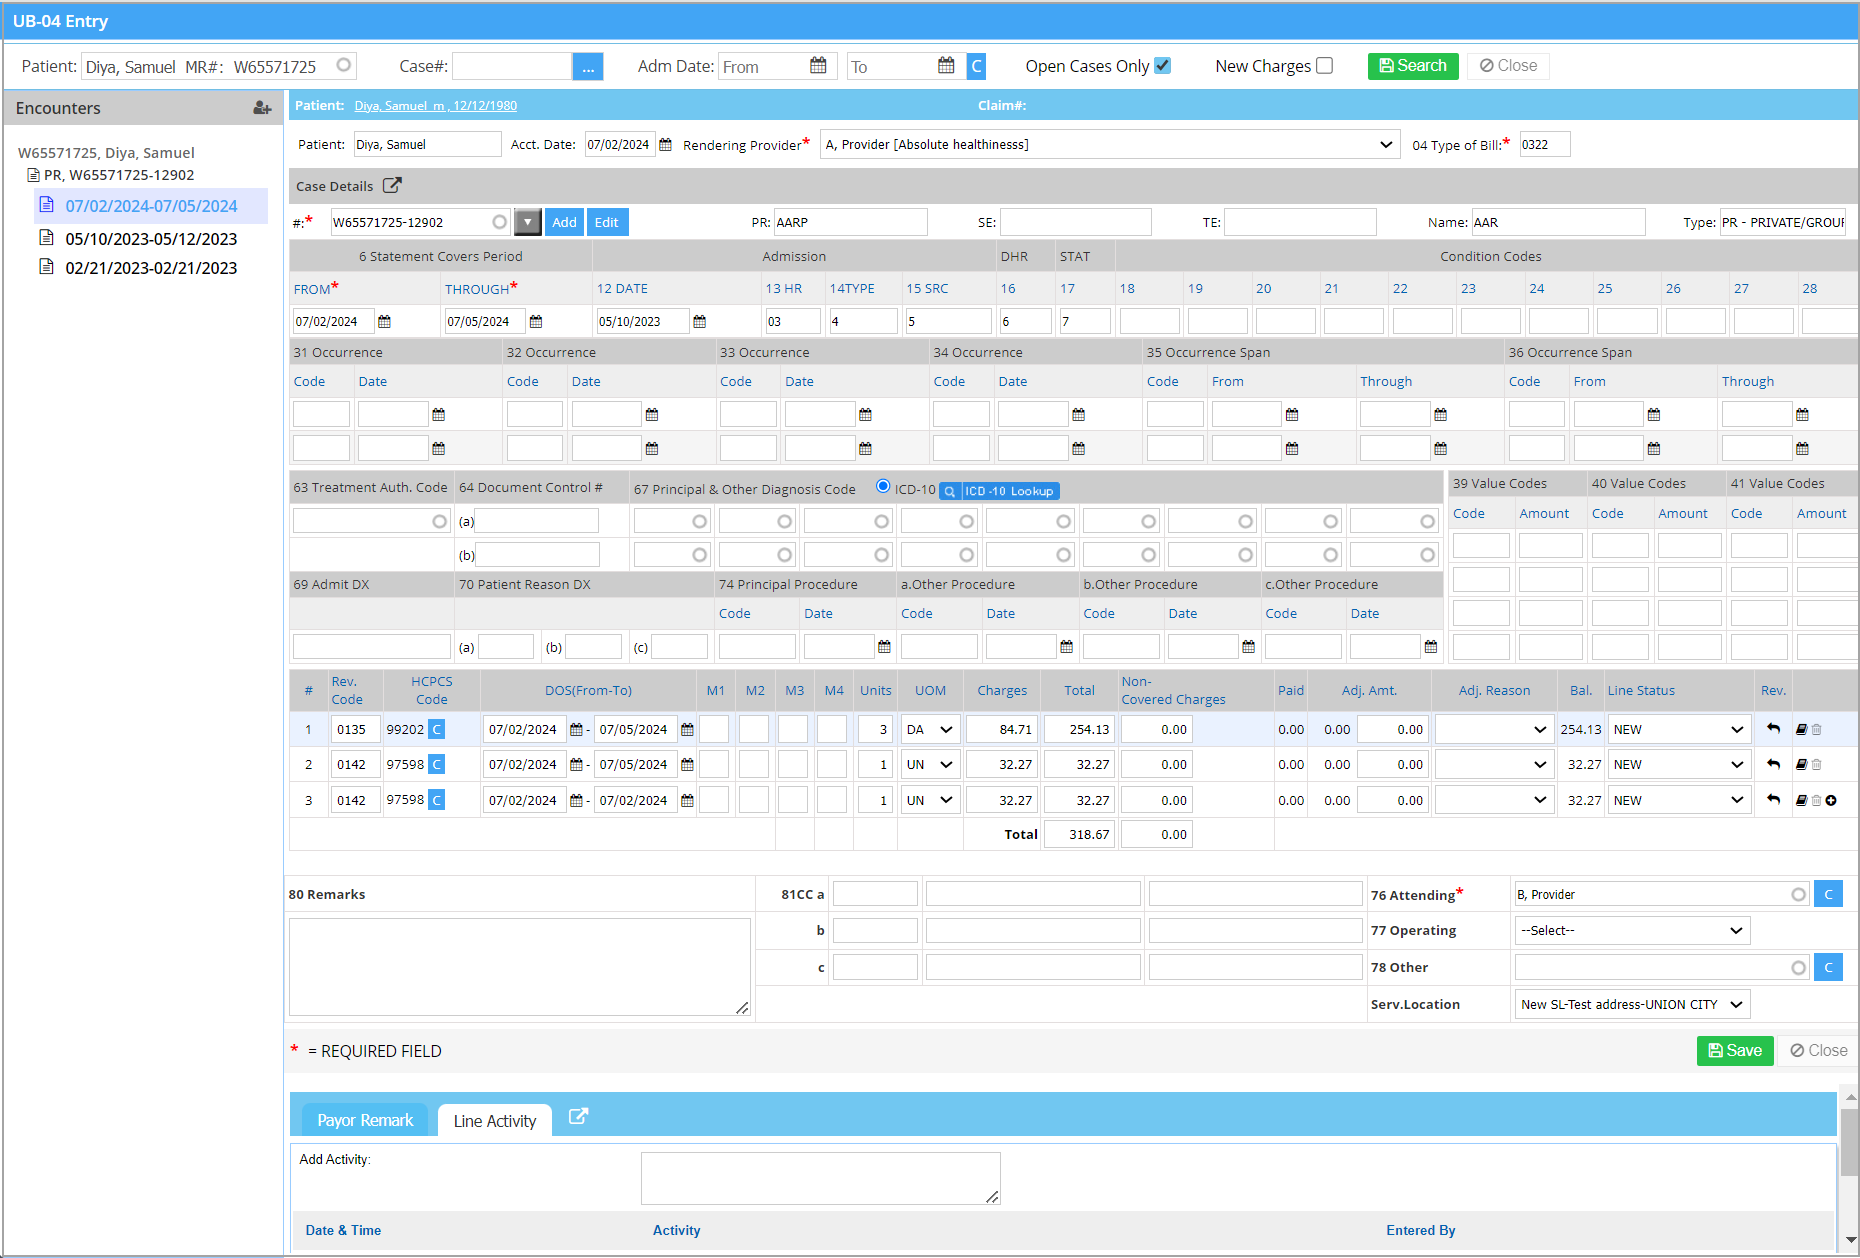
1.6 UB04 Screen Upgrade
The main screen of UB04 has been upgraded to a new UI.
Part -2 Reports
2.1 ‘K3. Patient Clinical Analysis Report’- Selective Document Download Option
K3 Report will now have a selective document download option wherein users can select the patient documents that are to be downloaded. A new search section named ‘Patient Documents’ has been included with the search fields Document type and Document creation date. Multiple documents can be selected in one go (Press Ctrl to select multiple items.)
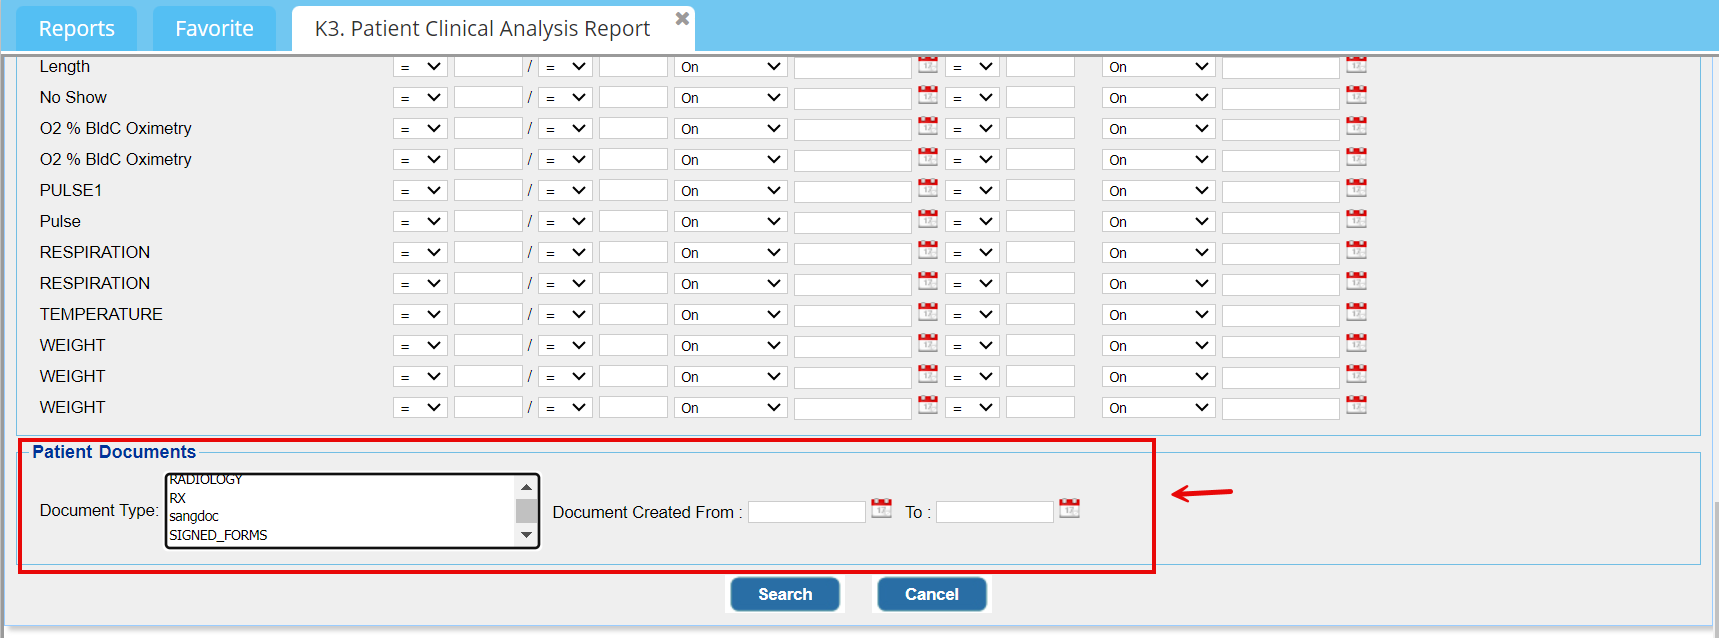
By default, the report will show only those visits of the patient that are in the selected date range. To view all visits of the selected patients, the check box ‘Include all visits for the patient(s)’, is to be checked.

2.2 Accession# Added to C4 and C10 Reports
The detailed CSV output of ‘C4. Generate Patient Pre-Collection Letter’ and ‘C10. Generate Patients in Collections List’ will now have Accession # as the last column.
2.3 ‘I21. Billing Process Turn Around Report’
I21 report has been fine-tuned and performance improved.