Product Release Version: v23.0.0
February 2024 Product Release
© 2024 Practice Management System
Disclaimer: All rights are reserved. No part of this work may be reproduced in any form or by any means through graphic, electronic, or mechanical, including photocopy, recording, or information storage and retrieval systems – without written permission of the publisher.
The products that are referred to in this document may be either trademarks and/or registered trademarks of the respective owners. The publisher and the author make no claim to these trademarks.
While every precaution has been taken in the preparation of this document, the publisher and the author assume no responsibility for errors or omissions, or for damages resulting from the use of information contained in this document or from the use of programs and source code that may accompany it. In no event shall the publisher and the author be liable for any loss of profit or any other commercial damage caused or alleged to have been caused directly or indirectly by this document.
Printed February 2024 at PracticeSuite, Inc.
Part – 1 Product Enhancements
1.1 Document Manager: Upgraded Scanner Software
Practice Management System has upgraded its scanner software to provide a cross-platform document-scanning application for its customers. The new service requires merely a one-time setup during the first access.
Setup
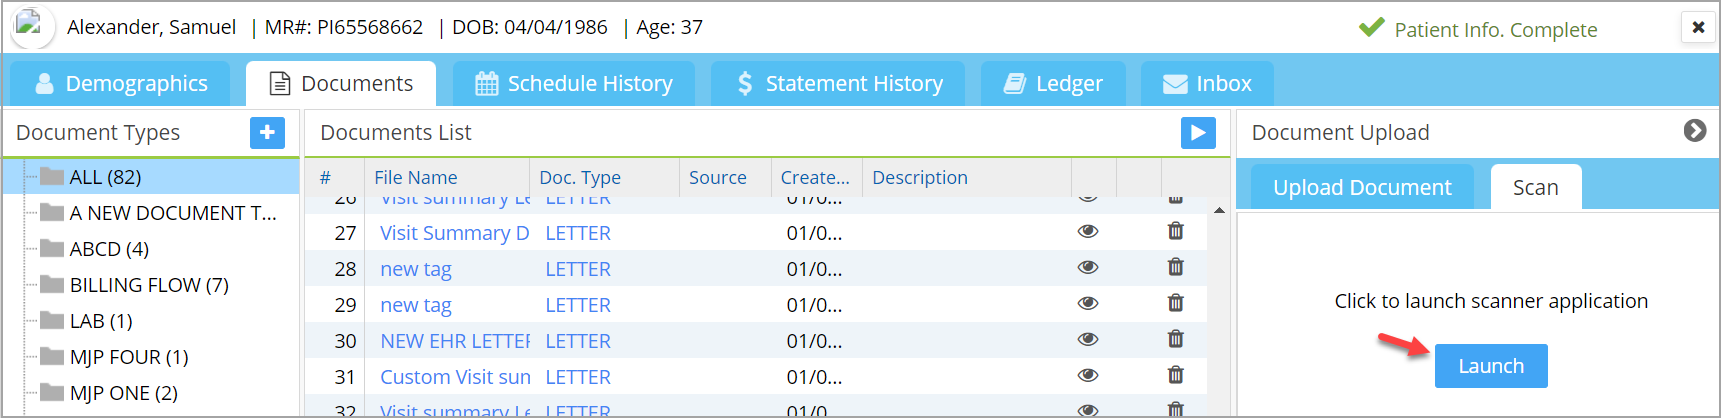
Go to Patient Demographics->Documents->Document Scan and click on ‘Launch’.
2. The user will be prompted to install a one-time setup of the service. The prompt has a ‘Download’ button. Click on it.

3. Once the installer is downloaded, double-click on the downloaded installer (on Windows and Mac) to install the service. This will take just a few seconds.
4. Once the scanner is launched, the user will be directed to the below user interface screen, which has scanning-related options on the right side and a top menu with page edit shortcuts.

5. From the ‘Select Scanner’ drop-down in the top right corner, select a scanner and click on ‘Scan’. Once the required pages are scanned, they need to be saved to the patient’s document section using the ‘Upload’ button. To learn more, click here.
1.2 Inter-office Messages- Forward Facility Restored
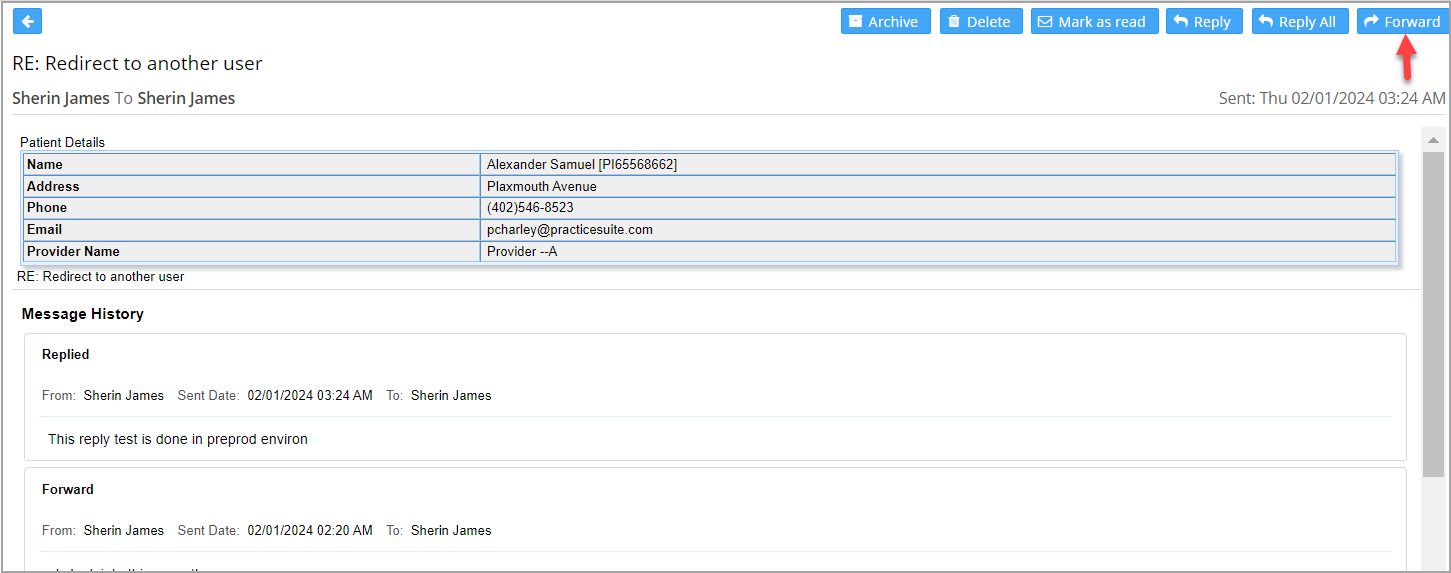
Message forward functionality, which existed in the old UI, is reinstated. Users can forward messages from the ‘Inbox’.
1.3 Authorization Desk: Facility to Add New Authorization
Users can now add new authorizations for patients from the Authorization Desk through the newly created ‘New Authorization’ button.
To create a new authorization from the desk, type in and search for a patient using the Patient Smart Search field provided. This will enable the ‘New Authorization’ button. Click on the button to open the authorization screen for the patient, where new authorization information can be added and saved.

1.4 Patient Portal: Multiple LE-based Payment Process
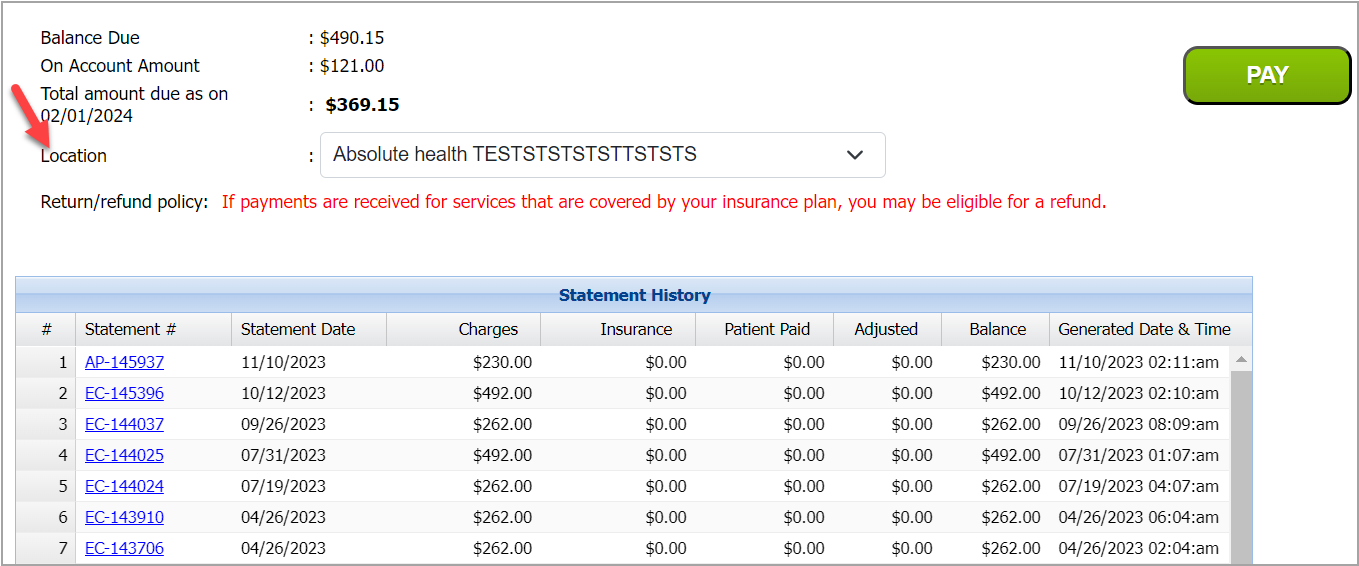
Patients can choose a location (legal entity) while making payments from the patient portal. A new drop-down named ‘Location’ is introduced in the Payment screen of the patient portal (refer to Image 1.4).
If the patient pays through the Quick Pay option, the total outstanding balance of the patient will be displayed. The location will default to the one with the most encounters. For logged-in patients, the drop-down is defaulted to the location that has the most line encounters in the given statement number. In both cases, patients can change the default location to any one of their choice. The location shown will be based on the rules shown in Table 1.6. Users can select another location from the drop-down if required.
| Scenario | Default value in Location |
| A Location L exists with the highest number of line encounters | L |
| If all locations have an equal number of encounters and a primary LE exists, | Primary LE |
| If all locations have an equal number of encounters and no primary LE exists, | The first LE in Alphabetical order |
Table 1.6
1.5 Scheduler – Follow-up Screen Enhancements
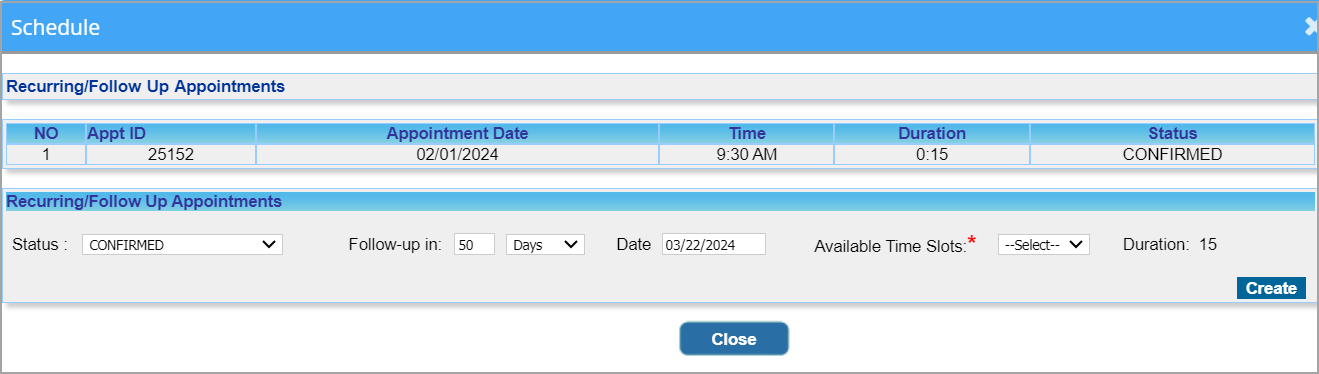
Henceforth, for setting up follow-up appointments for patients, users need not provide the exact date of follow-up. Instead, they can provide the count of days after which the follow-up appointment can be taken. This time interval can be provided in days, weeks, or months. The system auto-calculates the exact date of the follow-up, and the available time slots for the selected day are shown in the adjacent drop-down. The user may then choose a convenient time slot for the follow-up.
1.6 eFax: Auto Refresh Feature
The eFax screen is now equipped with an auto-refresh feature. The screen refreshes itself on every update, and the user need not manually refresh the screen for every change.
1.7 One Clinical Quality Measure Added
| Quality ID | Description |
| 177 | Percentage of patients aged 18 years and older with a diagnosis of rheumatoid arthritis (RA) who have an assessment of disease activity using an ACR-preferred RA disease activity assessment tool at ≥50% of encounters for RA for each patient during the measurement year |
1.8 Offline Reporting Feature in D3 Report
Offline reporting feature has been implemented in ‘D3. Summary-Patient/Guarantor Balance and Aging Report’.
1.9 Schedule History: Excel Output Available
The patient’s Schedule History page now offers an Excel output option in addition to the currently existing PDF export.

1.10 Letter master: More Tags included
Appointment Reminder:
Text and email appointment reminders will show the provider’s address along with the provider’s name. The following tags are used to replace the address part:
<<PROVIDER_ADDRESS>>
<<PROVIDER_CITY>>
<<PROVIDER_STATE>>
<<PROVIDER_ZIP>>
Tags for Secondary and Tertiary Insurance
New tags have been added for fetching secondary and tertiary insurance information. If the patient has multiple insurances at the same level, the most recently created insurance will replace the tag.
1.11 Charge Master: Case and Demographics Popup Screens Updated
The case screen and patient demographics pop-up screens from Charge Master have been updated to the new UI.
Part -2 Reports
2.1 ‘A1. Appointment Schedule Report’: Added a Direct CSV Export Option
A direct CSV output has been added to the A1 report, and it will have the following fields:
Patient Last Name, Patient First Name, Cell Phone Number, Provider Name, Location Name (Legal Entity), Appointment Status, Appointment Type, Appointment Date.

2.2 ‘I8. Summary Encounter Line Activities Report’: Type of Service Added
Henceforth, the type of service information will be included in the detailed CSV and offline outputs of the I8 report.
Part 3: Resolved Items
3.1 Claims Workbench
3.1.1 New Paper Bucket Fixed
Previously, the new paper bucket in the Claims Dashboard displayed BILL_TO_PT lines as well. Now the bucket has been updated to show only new paper claims.
3.1.2 Paid Close Claims in Pending Response Bucket
In the Claims Workbench, paid-close claims were wrongly shown in the pending response bucket. This is resolved.
3.2 Count Mismatch in Favorite KPI section Corrected
A couple of reports accessed through the Favorite KPI section on the home screen had record counts that did not match the counts shown in the KPI. This is resolved.
3.3 Collections Manager: Date Filters Corrected
The concern that date filters were not giving accurate search results in Collections Manager has been resolved.