Configuring Holidays and Breaks in the Scheduler
Holidays specific to the practice can be recorded in the system to prevent appointment scheduling on those dates. Additionally, the practice has the flexibility to define breaks for specific hours instead of blocking an entire day. Follow the steps below to set up holidays and breaks in the scheduler.
1. From the main menu, select the Scheduler module.
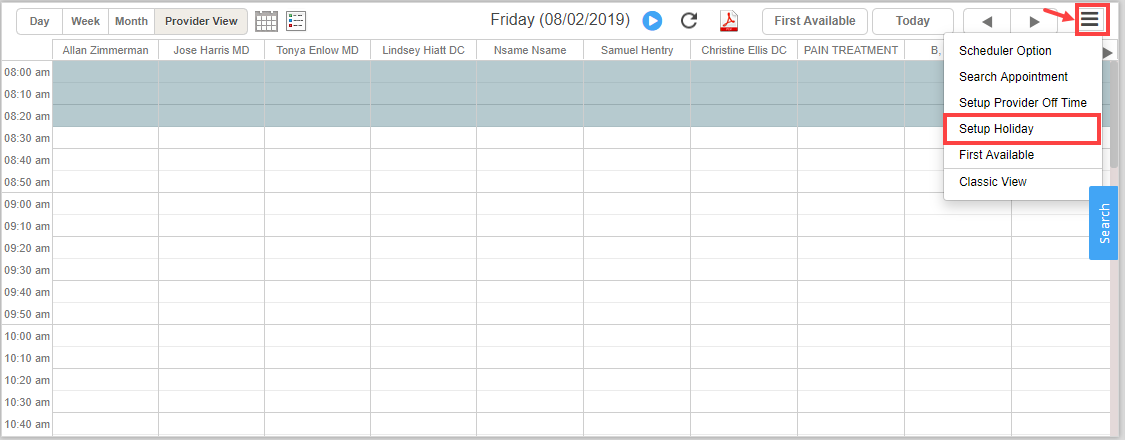
2. Click on the ![]() icon and select Setup Holiday option from the drop-down. See Image 1.
icon and select Setup Holiday option from the drop-down. See Image 1.
3. A list of all saved holidays and breaks in the system is displayed. Click on the ![]() button (highlighted in Image 2) to open the Break Information screen.
button (highlighted in Image 2) to open the Break Information screen.

On clicking ![]() button, the screen as in Image 3 is displayed.
button, the screen as in Image 3 is displayed.
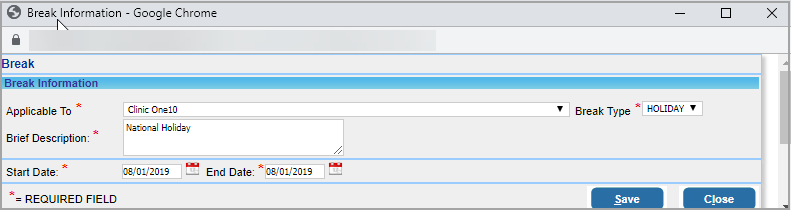
4. From the list, select the Legal entity for which this holiday is applicable.
5. From the Break Type drop-down, select Holiday.
6. Enter a Brief Description of the break.
7. Select the holiday Start Date and End Date. If the holiday is a single day, the Start Date and End Date should be the same.
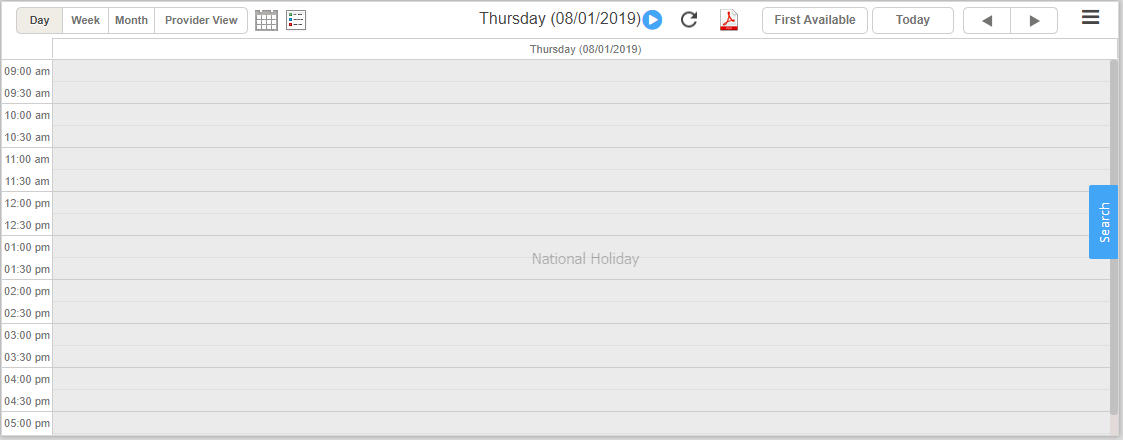
8. Click on Save. Click on the refresh button![]() provided at the top of the scheduler screen if the change is not reflected in the scheduler. For the break description details given in the above screenshot, the holiday for the practice will be displayed in the scheduler, as shown in Image 4.
provided at the top of the scheduler screen if the change is not reflected in the scheduler. For the break description details given in the above screenshot, the holiday for the practice will be displayed in the scheduler, as shown in Image 4.