All about Service Location Master
1. Service Location Master screen can be used to add new service locations and edit existing service location info.
2. Go to Advanced Setup and click on Service Location to access the Service Location Master screen.
3. Click ![]() button to add a new service location.
button to add a new service location.
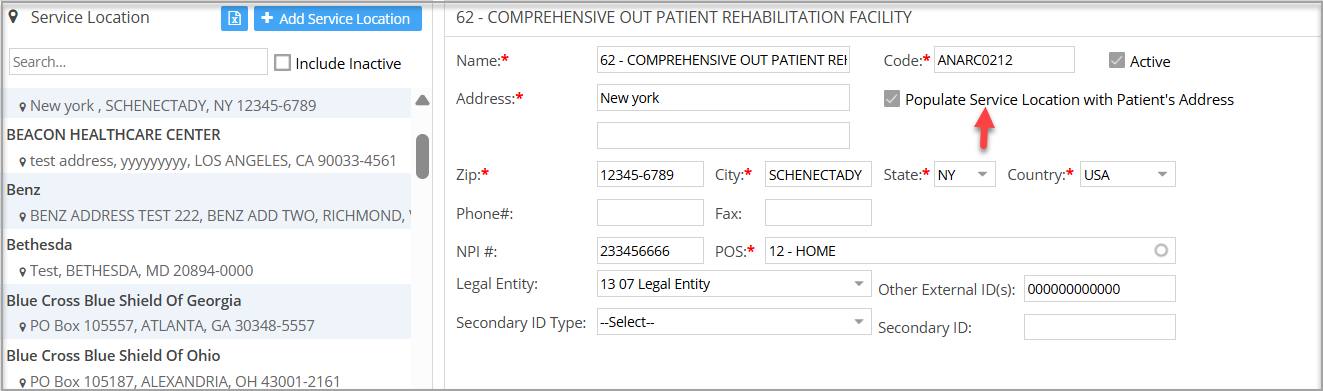
Mandatory fields are Name, Code (automatically generated on entering name; the user can edit this if required), Address, Zip, city, State, Country, POS.
4. Click on any service location on the left to display the related info and edit the same.
5. Service locations no longer required can be made inactive by unchecking the ![]() checkbox.
checkbox.
6. To view inactive service locations, check the box Include Inactive beside the search field. Inactive locations will appear in red text for easy identification.
7. An export to Excel option is provided in the Master screen to export the service location master records to an Excel file.
8. The Service Location Master has a new configuration: Populate Service Location with Patient’s Address. Using this field, practices can now designate the patient’s home address to populate the location address on professional claims (both paper and electronic), regardless of the place of service (PoS) code. When enabled, this option overrides the default place-of-service address logic and uses the patient’s address in the service location segment.