Practice Management System
Release Note
Product Release Version: v22.10.0
Product Release Date: Nov 2023
© 2023 Practice Management System
Disclaimer: All rights are reserved. No part of this work may be reproduced in any form or by any means through graphic, electronic, or mechanical, including photocopy, recording, or information storage and retrieval systems – without written permission of the publisher.
The products that are referred to in this document may be either trademarks and/or registered trademarks of the respective owners. The publisher and the author make no claim to these trademarks.
While every precaution has been taken in the preparation of this document, the publisher and the author assume no responsibility for errors or omissions, or for damages resulting from the use of information contained in this document or from the use of programs and source code that may accompany it. In no event shall the publisher and the author be liable for any loss of profit or any other commercial damage caused or alleged to have been caused directly or indirectly by this document.
Printed Nov 2023 at PracticeSuite, Inc.3206 Cove Bend Dr Suite A Tampa FL 33613
Part – 1 Product Enhancements
1.1 Work Queue
1.1.1 Set Reminders through Work Queue Sub Status
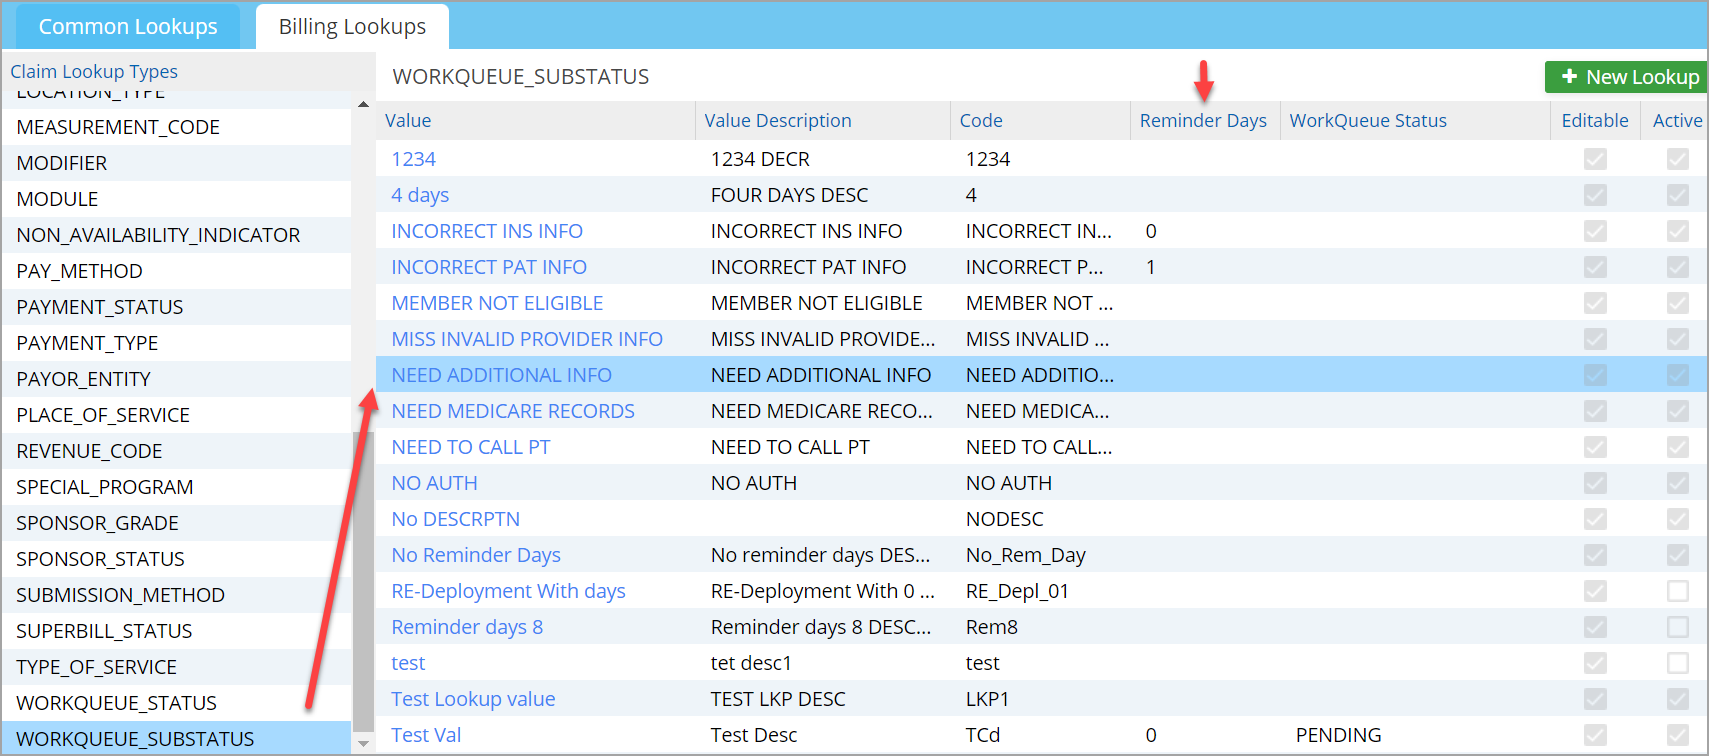
Users can now preset the claims follow-up time frame (days) from the work queue’s sub-status lookup and specify the days for each sub-status. Each sub-status can be linked with a specified follow-up time frame. The claims with the sub-status will reappear only after this time frame. This feature will relieve users from setting reminders individually for each claim.
The sub-status and the time frame can be set up from the Advanced Setup ->All Lookups -> WORKQUEUE_SUBSTATUS. Click on the sub status that needs to be updated and enter the days to remind in the field – “Reminder Days”. This defaults the reminder days in the work queue for all claims for that sub-status where the days have been preset, however, users can override the days in the work queue screen.
1.1.2 Work Queue – Linking of Status and SubStatus
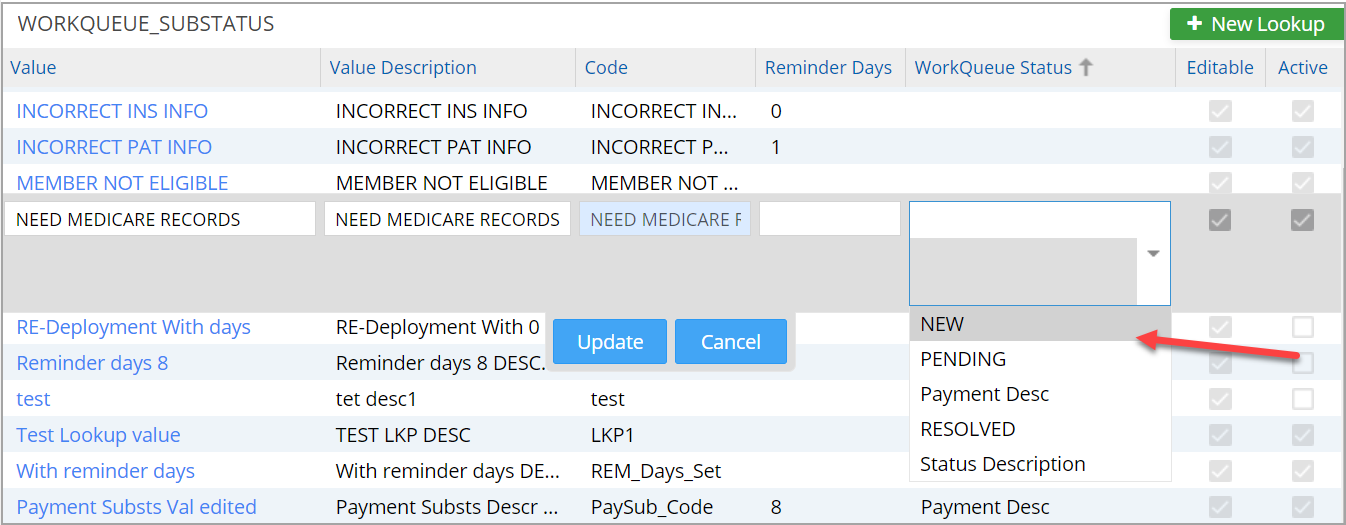
Similar to the feature available for Collection Manager, you can now link work queue status and sub-status. Only the sub-statuses linked to the status will appear in the sub-status field.
To link the status with the sub-status, go to Advanced Setup-> All Lookups->Billing Lookups–> WORKQUEUE_SUBSTATUS. For each sub-status, users can assign one or more statuses from the newly added “WorkQueue Status” multi-select combo (see Image 1.1.2).
1.1.3 Creation of Additional Work Queue Statuses
Users can hereafter add new work queue status from the billing lookup screen.
To add a new status, go to All Lookups->Billing Lookups, select WORKQUEUE_STATUS, click on  and enter the required info, and hit save to have the new status added to the list.
1.2 eFax
1.2.1 Task Assignment
A new user assignment field has been added to the eFax screen. The field is named “Assigned To” and clicking on  brings up the user list and the fax will get assigned to the selected user.
The below steps explain the process of assigning a fax to a user.
1. Open the fax message.
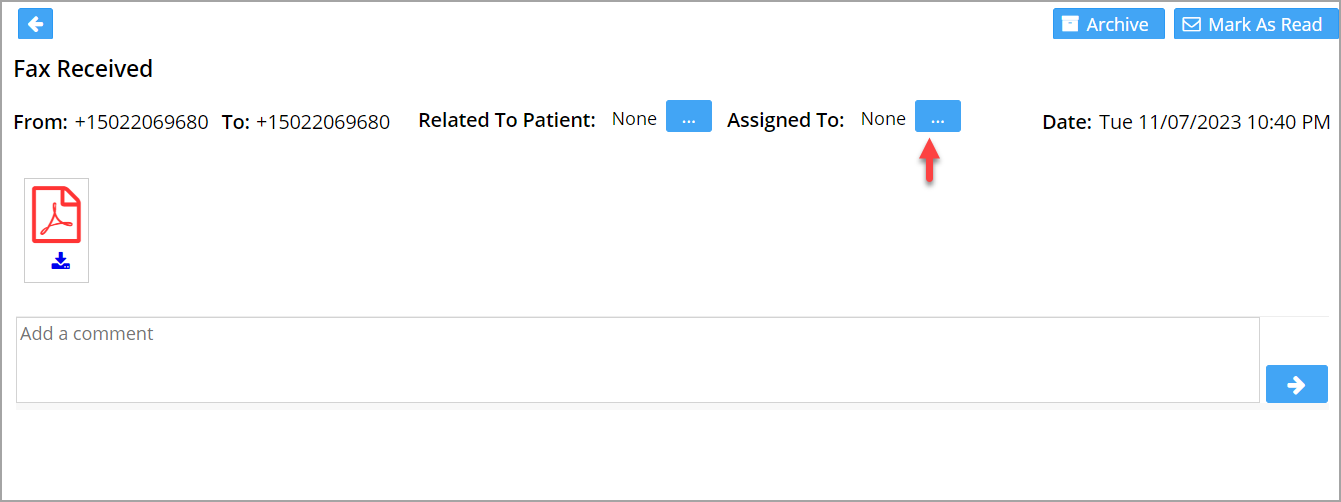
2. On the message screen, click on the (highlighted in Image 1.2.1a) to open the “Assigned To” popup.
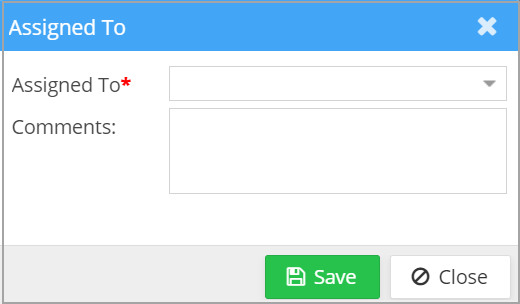
3. Select a user from the “Assigned To” drop-down (see Image 1.2.1b), enter comments if needed, and hit “Save” to complete the user assignment. A confirmation message will appear on the screen- “Fax User Updated Successfully”.
All faxes assigned to a user will show up in the user’s “My Faxes” folder. The unread fax count is displayed as an orange-colored bubble. Additionally, a task gets assigned for the user in the ‘To Do’.
1.2.2 Upload Multiple Patient Documents from Document Manager
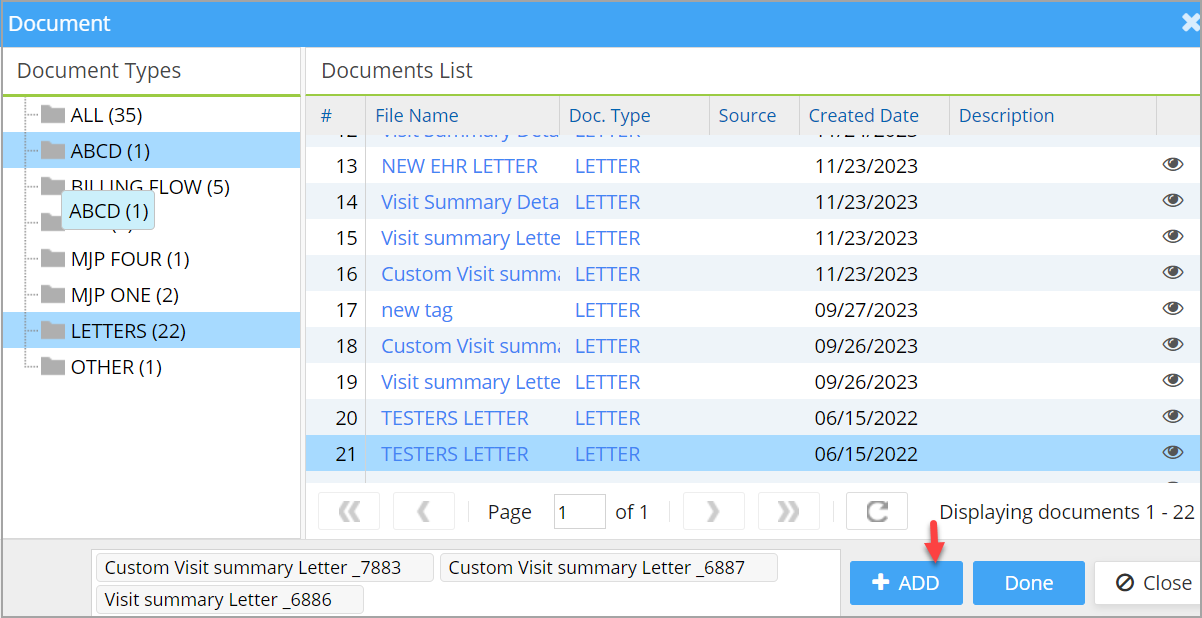
Users can hereafter attach multiple patient documents to the fax message (max of 3 files in one submission). To attach files, click on the  beside “Document” in the attachment section to bring up the patient’s document manager screen. Once the required files are selected, click on the “+ Add” option and thereafter hit the option “Done” to attach the files to the fax message.
1.2.3 Faxing Patient Demographic Sheet
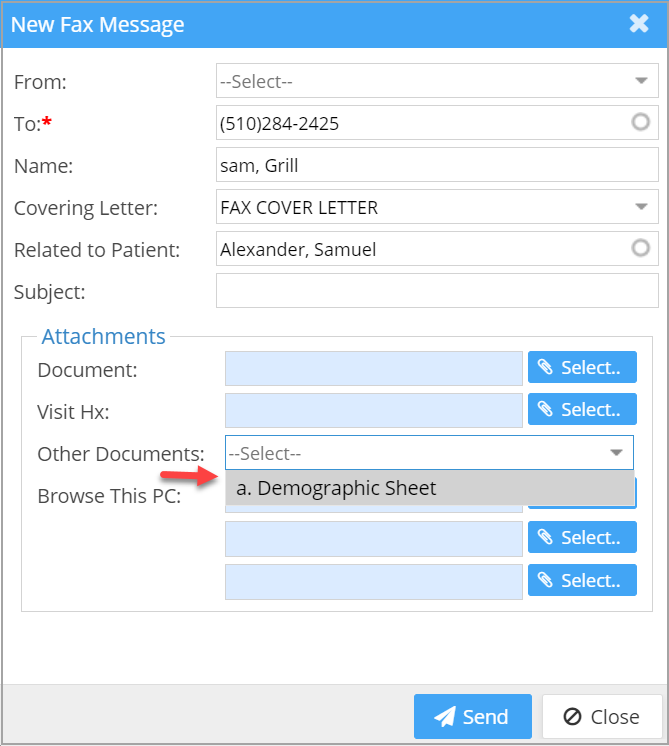
Users can now directly attach a patient’s demographic sheet from the eFax module. When composing a new fax, once the patient is selected, in the “Other Documents” dropdown select “Demographics Sheet”, as shown in Image 1.2.3.
1.3 Payments
1.3.1 Credit Card Payments Using USIO Latest Terminal Devices
Practice Management System is equipped to handle CC payments using the latest model USIO terminal devices.
1.3.2 New Field in Payment Master- ‘Bank Deposit Date’
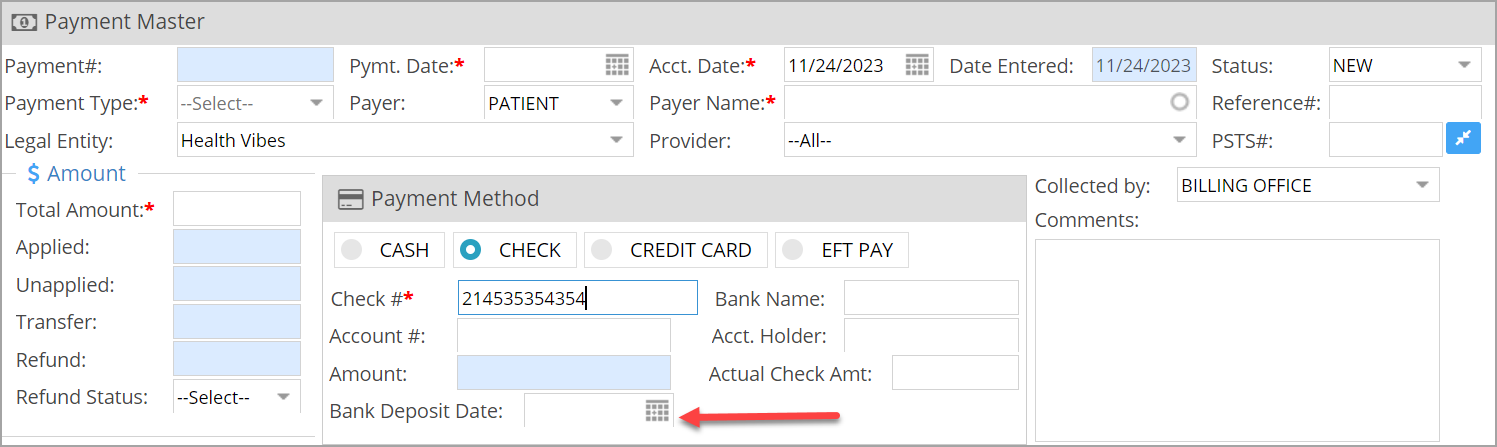
A new field named ‘Bank Deposit Date’ has been added to Payment Master screen and is available for check and EFT payments. This field is shown in the reports ‘I6. Posting Detail Report’ and ‘I4. Payment Deposit’ reports.
1.4 Claim Submission
1.4.1 New Rule for EDI claims
A new rule is created that can be used to populate Service location in Billing provider information. The rule is:
ALL:BILLING:SAMEASSL
1.4.2 Special Character ‘Comma’ Permitted
Henceforth, special character comma will be permitted inside claim notes along with currently allowed special characters such as – | . _ + – ‘ ” : ( ) / \ [ ] { } < > =
1.5 Inter-Office Messaging- Subject Line Update
Repetitive ‘RE:’s that appeared in the subject line when the message is forwarded several times, have been eliminated. The subject line will only contain one ‘RE:’ even after repeated forwarding.
1.6 Patient Statements – New Third Party Introduced
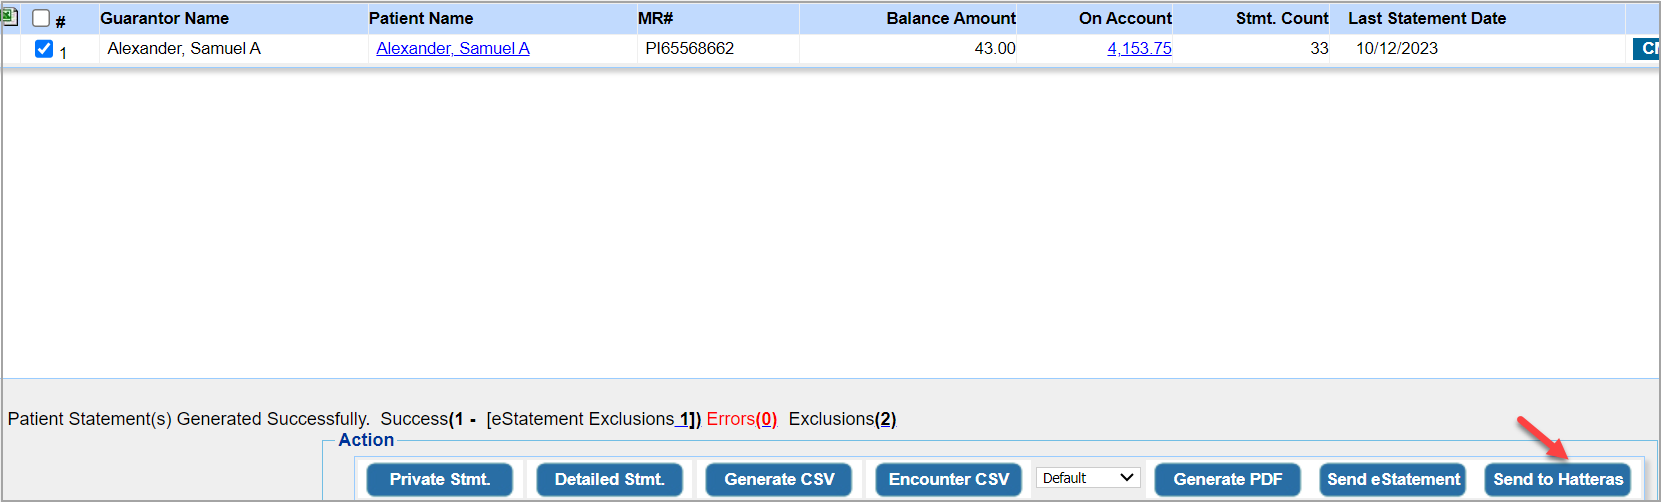
Practice Management System now associates with Hatteras to send Patient Statements. ‘C2. Generate Patient Statements Report’ changes in the context of this upgrade are as follows:
Patient Statement Send button will be appear as ‘Send to Hatteras’ for practices opting for Hatteras. For others, the button will work as earlier (‘Send to Trizetto’ for accounts opting for Trizetto and ‘Send to Ability’ for others).
1.7 Patient Specific Messages from Patient Screen
When called from patient demographics, the To-Do, eFax, and Need More Info Queue sections will display only those messages specific to the patient. This is already functioning for Inter office messages.
1.8 XSuperbill- Patient Alerts to be shown
XSuperbill screen has a bell icon placed next to the patient name which will display the patient- specific alerts.

Part -2 Reports
2.1 ‘K3 Patient Clinical Analysis Report’ updated
K3. Patient Clinical Analysis Report has been updated to comply with 170.315(b)(10) Electronic Health Information Export (Cures) criteria. To view the publicly accessible hyperlink of the export’s format, click here.
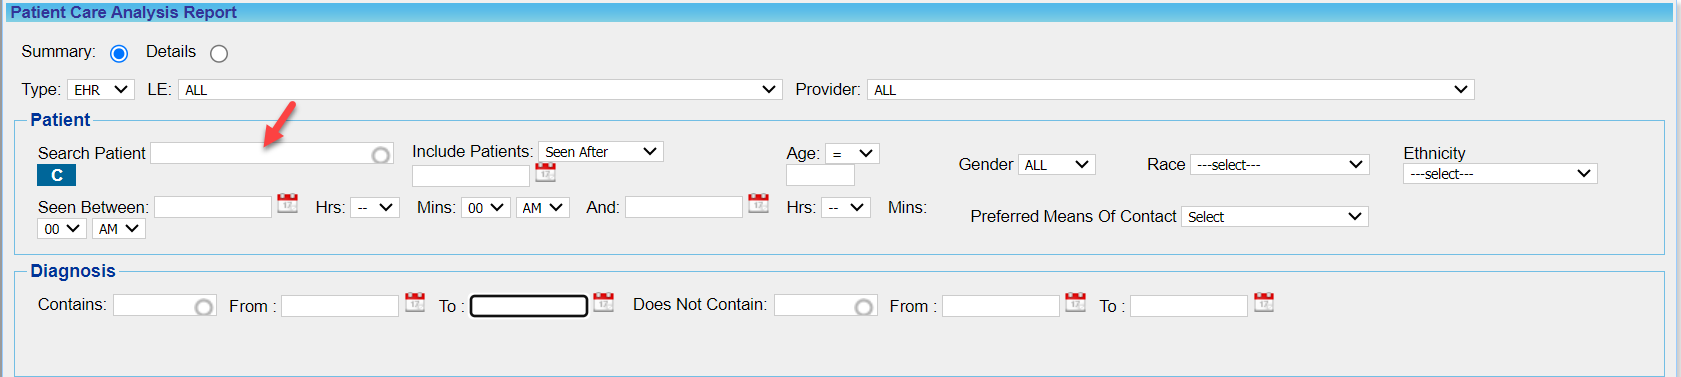
A. To export patient-specific C-CDAs and documents, a patient smart search option has been included in the K3 Report; see the highlighted portion in Image 2.1a.
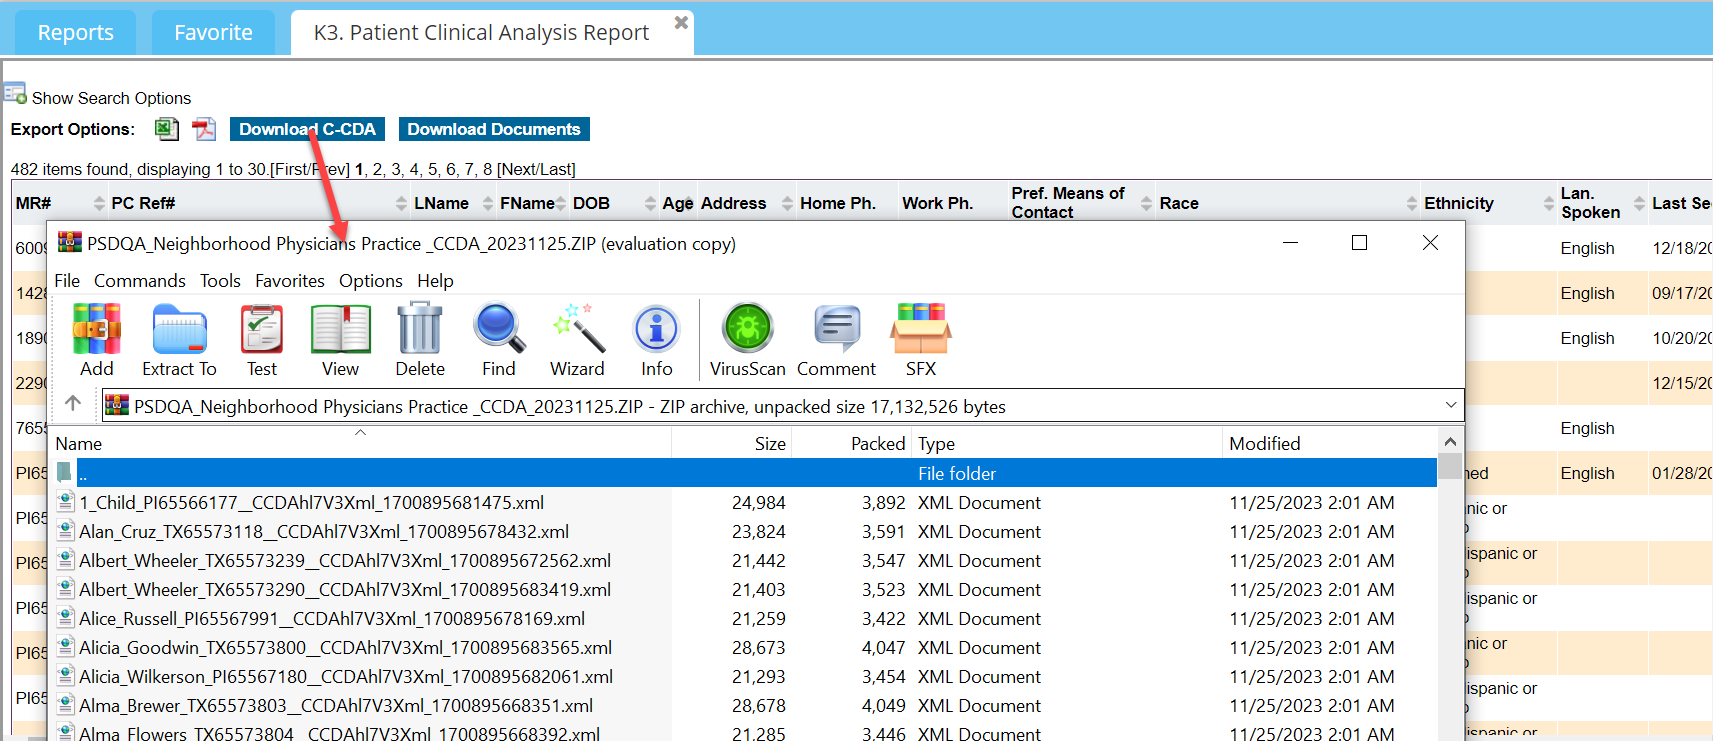
B. Export of C-CDA and Patient Documents of Single Patient and Patient Population from K3 report in Zip format is now possible. Image 2.1b shows the CCDA download.
2.2 Auth# Added to G5 Report and Collections Manager Outputs
Authorization info added to offline and excel outputs of ‘G5. Collector Worklist Report’ and Collections Manager Excel and CSV outputs.
2.3 Balance to be Reflected in A10 Report
Added Total Insurance balance and Total Patient balance to ‘A10. Eligibility Status Report’ and its excel output. A part of A10 report is shown in Image 2.3.

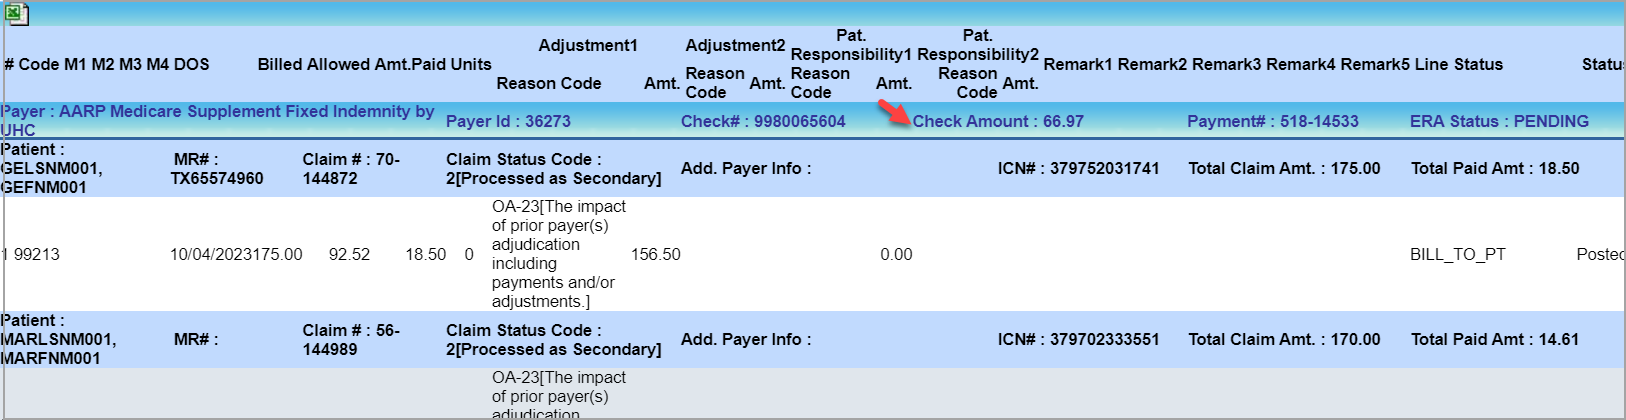
2.4 Check Amount Field Added to ‘J25. ERA Detail Report’
Check amount field has been added to J25 report and its the Excel output. Image 2.4 shows a portion of J25 report highlighting the Check amount field.
2.5 Guarantor Info Added in D2. Report
Guarantor information such as Name, Relation, address, and phone number, has been added to ‘D2. Detailed Insurance Aging Report’ and its detailed CSV output.
Part -3 Bug Fixes
3.1 Search Failure in Collections Manager Rectified
When any of the encounters had open line status with a remaining amount of 0.00, the search failed. This is now corrected.
3.2 Concern over Payment Amount Update Addressed
Users were unable to change the original amount if the amount was updated (due to transfers or refunds) and the updated amount was posted completely.
3.3 Unresponsive Close Button Issue resolved
The unresponsive ‘Close’ button in the Scheduler screen is now corrected.
3.4 Termed Procedure Codes Excluded from Search
During procedure code search in Charge Master, termed procedure codes were appearing in the search result. This is now fixed and termed ones are now excluded from appearing in the search results.
3.5 Duplicate Entries in Audit Log Removed
The audit log displayed duplicate entries in the user module, and in some cases, the account was wrongly depicted. This is now fixed.
3.6 Installment Payment Save Failure Addressed
Users were unable to save the installments for practices that did not have a payment gateway configured. This is now fixed.
Also rectified the issue that occurred in certain scenarios wherein the installment status could not be updated.
3.7 Payment# Display Format in I5 Report Corrected
Payment# displayed in the excel output of ‘I5. On Account Payment Report’ was formatted wrongly. It is rectified.